Everyone can have a Heiligenschein (Halo)

In April I did my usual running in the early morning (between 6 and 7 o’clock) . My trip makes me run between fields, forests and other nice, silent places.

One day, the sun was just coming up, I was running between the fields where the wheat was now about 30 cm high. My long shadow fell on this wheat-field and there it was: I noticed something strange around the shadow of my head. There was a quite bright glow. As I moved on, I noticed that this glow was moving with me. It did so, for several hundreds of meters.

At first I thought I had something in my eyes which causes this strange blur, but not so. I’m always carrying my smartphone with me and I thought, can I take a picture of it? Nobody would ever believe me if not. I took these two pictures:

Well, seeing them on the phone I knew that I had no problem with my eyes. This glow was really there.

As written previously, I’m a big fan of the StackOverflow Q/A-sites. Fortunately there is page dedicated to physics and thus I asked a question. Within hours I got an answer telling me that this is the so-called Heiligenschein-effect. Something with light reflection on water-droplets which are sitting on grass due to the sun being very low.

A comment to the answer from roadrunner66 says “[..] You are the only one who sees the brighter spot, another person looking at your shadow wouldn’t [..]”. So only the observer can see these reflections? The glow is actually not around my head, but around my eyes? It was easy to to proof: on one of my next trip in the same conditions and place I took the following picture. I simply hold my smartphone away from my body and took a picture – here is what has been captured:

Heiligenschein 3

The glow is around my phone, or better, around the image-sensor.

Halo for everyone

This is something everyone can observe. Here is what you need:

  • Get up and out early in the morning – just after sunrise, but not too late, one hour after sunrise the sun has become too high
  • A clear sky – get back to bed, if cloudy
  • A meadow or a field where grass-type leaved plants are growing – it does work on other surface, but is less visible
  • Position yourself so that your shadow is drawn onto the field

Gitolite and gitweb on Synology DS415+ with standard packages

Recently I put my hands on a Synology DS415+ Network-Attached Storage-unit. This device does a lot more than just storage. A whole bunch of services and applications can be installed via a web-interface. The device itself is running, by default, a “lightweight” Linux based on busybox and is filled up with custom builds of services and applications.

Synology DS415+

When I was asked to install a git-server/-service on it, there were already a lot of other services running. There are two git-servers provided via the Synology-package-manager: Gitlab and a “git-server”. I tried Gitlab which comes in a Docker-container. This was too much for the DS415+ – CPU and Memory consumption was going up immediately and finally crashing the whole system. I de-installed everything after a reboot.

The “git-server” was very simplistic and not exactly what the team was looking for. Installing git-repos on a per-user basis was too simple compared to the needs expressed by the team. However, git-server has to be installed and activated in order to have a git-executable available.

I’m always opting for gitolite in this kind of situations. I looked into how the internet was suggesting to install it on such a device. All of the How-Tos I found were suggesting to bootstrap the installation with ipkg to have the possibility to install much more packages from the nslu2-project.

The team wanted to keep the possibility of updating the DS415+ with the Synology-update process and was thus hesitant to add this package-source. Especially as the bootstrapping description mentioned explicitly that the “official” update-process might suffer after installation.

I finally succeeded to install gitolite and a gitweb-clone (gitphp) on the DS415+ without spoiling the system with external package-systems. Here is what I did:

1- Create user ‘git’ via the standard user-interface (have it creating a home-dir). Login with ssh as root to and  change to /sbin/no-login to /bin/sh for ‘git’ (/etc/passwd)
2- Login as user ‘git’ via ssh and
chmod 755 $PWD

This is necessary to make ssh-logins work with the public-private-key-method.

3- Create a directory for the user git to keep executables and add this path it to the user’s PATH variable.
mkdir ~/bin
echo 'export PATH=$PWD/bin:$PATH' >> .profile
4- Install mktemp for synology-intel-platform

Get the mktemp-package file (ipkg), unpack it (on a PC preferably) and copy /opt/bin/mktemp-mktemp from the archive to /usr/local/bin . This is actually a kludge to get mktemp which is not enabled by default. Installing it to /usr/local/bin should make it survived updates in the future.

5- Install Perl via the standard Synology package-manager.
6- Put your ssh-public-key to git’s directory as <your-future-gitolite-username>.pub
7- Logged in a ‘git’ install gitolite. I simply followed this guide.
gitolite/install -ln
gitolite setup -pk your-name.pub
8- Everything is readly now and gitolite-admin can be cloned (on your host as the user who owns the corresponding private key).
git clone git@host:gitolite-admin

The rest is standard gitolite administration stuff. Read http://gitolite.com/gitolite/gitolite.html#basic-admin .

9- Gitweb with Gitphp

I was unable to master the perl/cgi-setup of the DS415+ and gave up quickly when trying to make run gitweb. I found Gitphp which is a Gitweb-clone written in PHP. It was quite simple to set it up.

I had to enable the “Web Service” via the admin-interface. I also ticked ‘Enable personal website’. This way I could install gitphp directly to ~/www of the git-user.

mkdir ~/www
cd ~/www
git clone https://github.com/xiphux/gitphp.git .

I started with a simple configuration by adjusting some self-explaining variables in ~/www/config/gitphp.conf.php
after having it copied from gitphp.conf.php.example. More configuration remains to be done.

gitphp

Raspberry PI: USB powered HDMI-audio break-out

My original situation summarizes as follows:

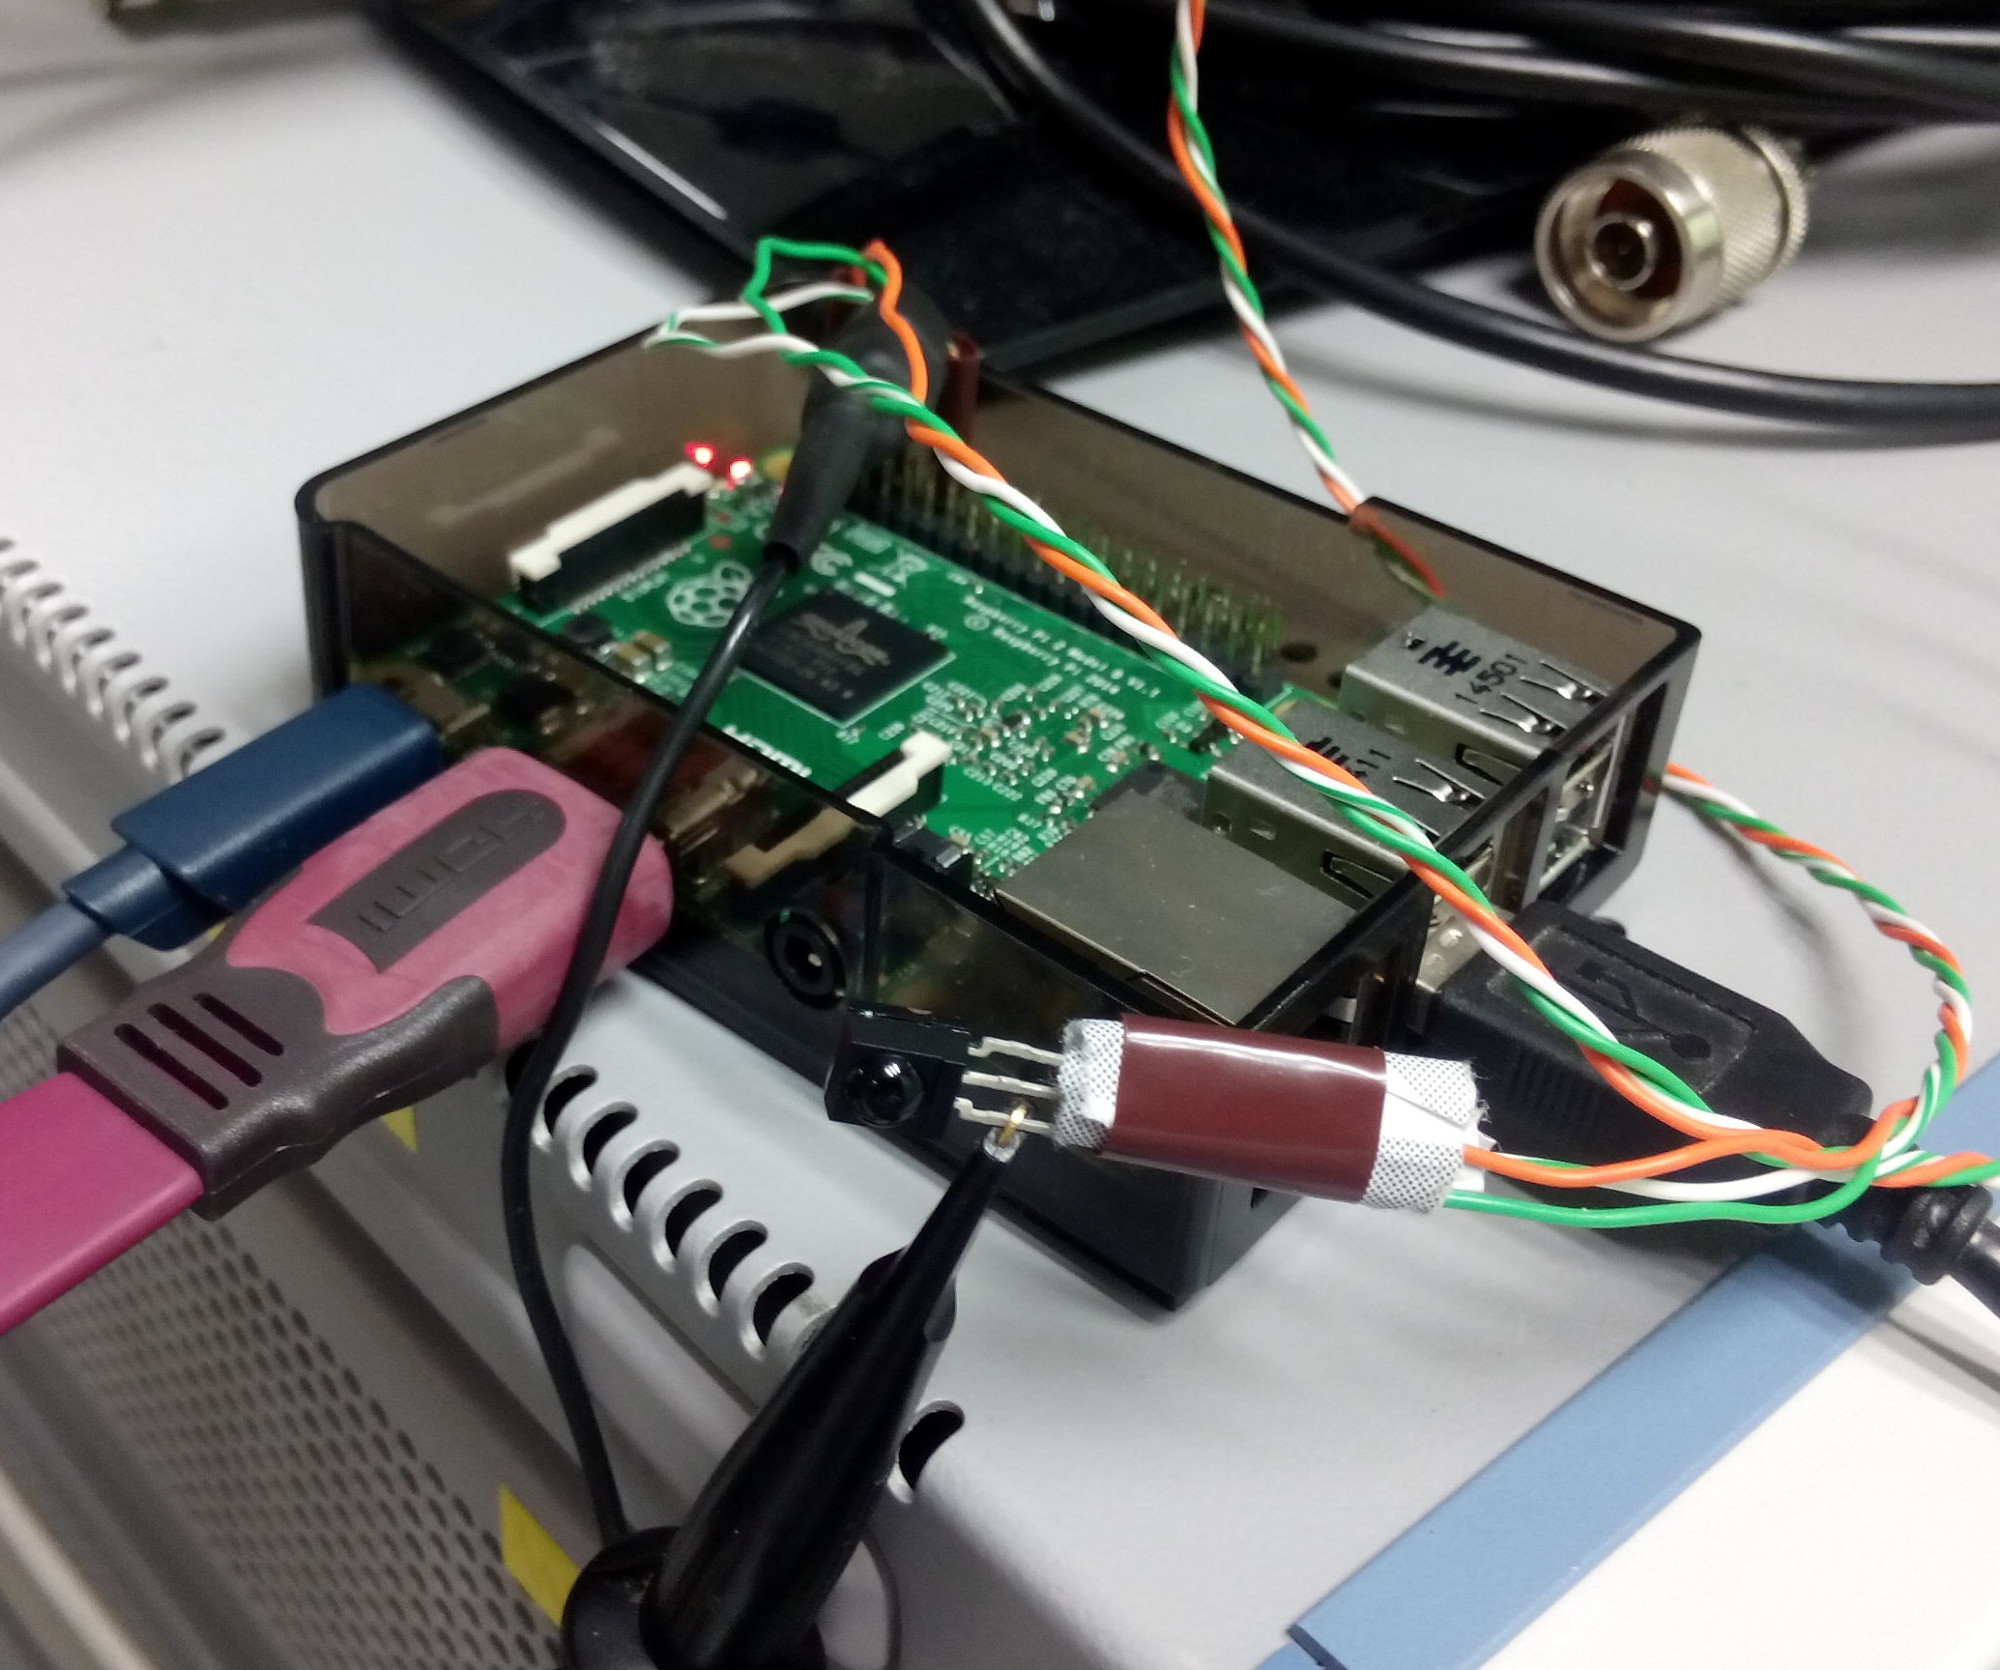
  • a Raspberry Pi 2 is connected to my TV-screen via HDMI
  • FullHD-video-decoding and displaying in general works like charm.
  • digital audio (PCM and AC3) should be embedded in the HDMI-data-stream
  • my TV does not have a digital audio output but can consume the audio embedded in the stream
  • my audio-decoder and -amplifier does not have a HDMI-input
  • my software setup on the PI won’t allow the use of a HifiBerry-extension

What I would ideally need is something which

  • takes a HDMI-input,
  • splits out the digital-audio to a S/PDIF-output (optical or coaxial)
  • and forwards the original HDMI-signal on a HDMI-output.
  • Ideally this device is small and powered over USB (so that it doesn’t need an extra power-supply).

Believe it or not, this actually exists:

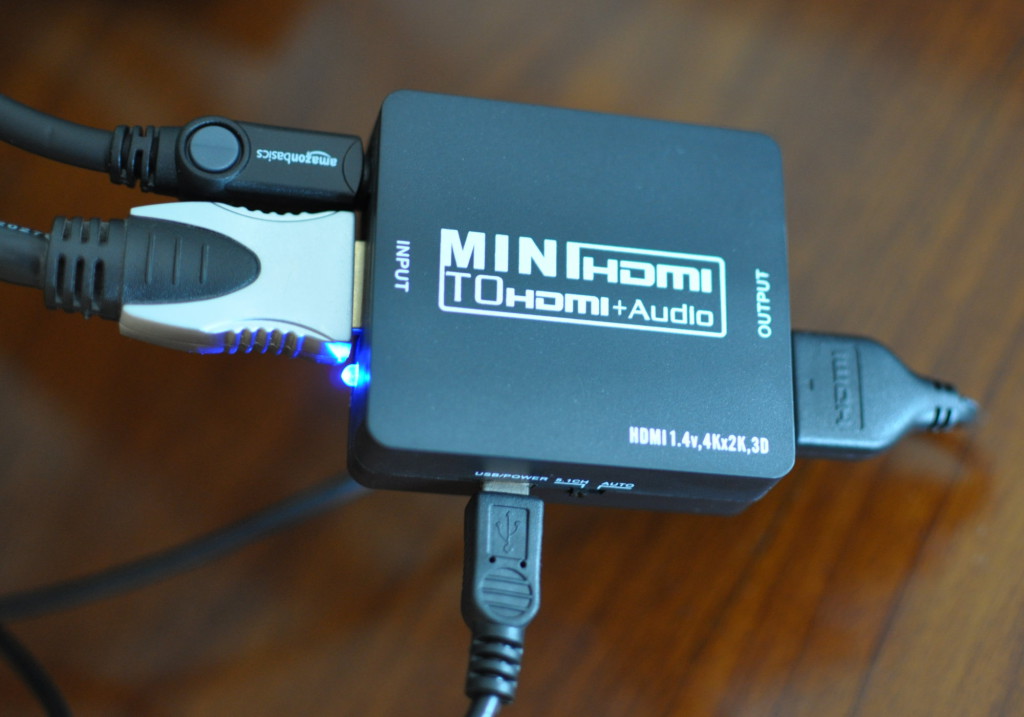
Self-powered HDMI-audio-splitter

It took me some time but I eventually found one on Amazon for around 25 euros. Other people have seen this kind of devices on eBay in 2014 and earlier.

Software problems

Inserting this device between the Raspi and the TV was straight forward. I just plugged everything on my running Pi and everything worked immediately – I thought. In fact there were two problems:

Problem 1: even when playing AC3-audio (2.0, 2.1 or 5.1), the Pi would only send PCM-frames.
Problem 2: after a cold-start, the Pi was not able to determine the correct resolution of my screen.

It turned out that both problems have the same root-cause:

When connecting a HDMI source to a HDMI sink (or when powering up one of them), the source gets some meta/configuration-information about the sink. It reads the so-called EDID-data. In it, among others, the source can find the supported screen-resolutions and the supported audio(-container)-formats.

Audio AC3-passthrough

Based on the list of accepted audio-formats the Raspi, or better the OpenMax-library (omx), will determine whether or not to pass-through AC3-audio (integrate it into the HDMI-data-stream). At some point in time that EDID data is read and if it does not list the capability, the software won’t even try to send AC3-data, but will decode it in software to Stereo-PCM.

But wait, now that there is the HDMI-splitter, where is the EDID-data coming from? Well, the splitter just passes through the information from my screen to the Raspi. My screen does not have a digital audio output. Most likely it tells sources that is doesn’t support anything other the PCM-audio.

Raspbian, which I’m using, has some pre-installed tools with which can be used to read and decode the EDID data. There is tvservice for reading EDID and dumping it to a file

pi@vdr-pi ~ $ /opt/vc/bin/tvservice -d edid-5.1.dat
Written 256 bytes to edid-5.1.dat

And there is edidparser for decoding the dumped .dat-file.

pi@vdr-pi ~ $ /opt/vc/bin/edidparser edid-auto.dat  | grep audio
HDMI:EDID monitor support - underscan IT formats:no, basic audio:yes, yuv444:yes, yuv422:yes, #native DTD:1
HDMI:EDID found audio format 2 channels PCM, sample rate: 44|48 kHz, sample size: 16|20|24 bits
HDMI:EDID has HDMI support and audio support

This last snippet shows the parsed the EDID-data. It was as I was suspecting. Nothing else then PCM is accepted by my HDMI-sink.

There seems to be several ways to convince the system that AC3-passthrough is possible though. The easiest for me was to use the switch provided for this reason on the HDMI-splitter. By default it is set to auto which gives the EDID seen above.

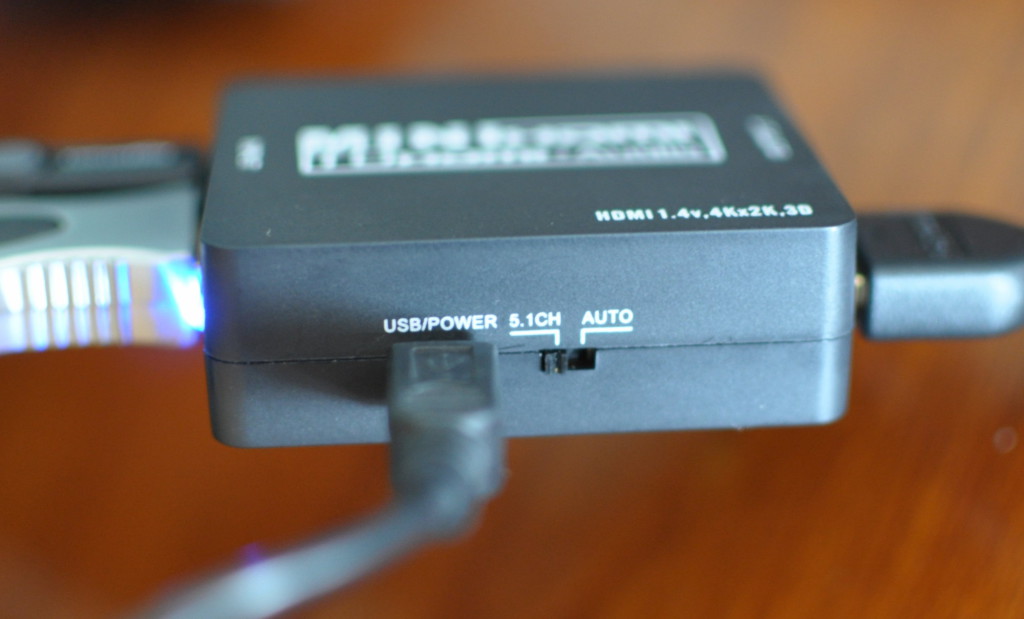
HDMI-audio-split: auto vs 5.1-mode

Putting the switch to 5.1 gives the following EDID-output and AC3-passthrough started to work, after I restarted the player-software:

pi@vdr-pi ~ $ /opt/vc/bin/edidparser edid.dat  | grep audio
HDMI:EDID monitor support - underscan IT formats:no, basic audio:yes, yuv444:yes, yuv422:yes, #native DTD:1
HDMI:EDID found audio format 2 channels PCM, sample rate: 32|44|48|88|96|176|192 kHz, sample size: 16|20|24 bits
HDMI:EDID found audio format 6 channels AC3, sample rate: 32|44|48|88|96|176|192 kHz, bitrate: 1536 kbps
HDMI:EDID found audio format 6 channels DTS, sample rate: 32|44|48|88|96|176|192 kHz, bitrate: 1536 kbps
HDMI:EDID has HDMI support and audio support

The other solutions I found suggested to change some boot-parameters in /boot/config.txt . Several EDID-related values can be set to override the EDID-values delivered by the sink. For this problem the HDMI_FORCE_EDID_AUDIO setting might work. I couldn’t use it; it conflicts with the solution of my other problem. (See here for more/all config.txt-parameters)

Screen resolution

By default the Raspi will select the native resolution of a screen as per EDID-data. My splitter is powered by the Raspi, so it is not running before the Raspi boots. It seems that at the moment the Raspi reads the EDID-information the splitter has not yet read the EDID from the screen. I don’t know what kind of data is received this way, but it is not correct.

I tried setting several HDMI-parameters in the config.txt nothing made it work. Except one: I forced the Raspi to read the the EDID-data from a file instead of the sink. For that, I put the edid.dat from above (this one I got with edidparser after having set the HDMI-splitter to the 5.1 mode) into the /boot-folder and added the following line to /boot/config.txt

hdmi_edid_file=1

Now everything worked as I wanted it to be.

Raspberry Pi 2: LIRC with an active-low IR-receiver with raspbian Jessie

On my journey of using the Rasberry Pi 2 for something useful, the moment has come where I want to plug an Infra-Red-receiver to it.

I’m not new to this, for years I used one plugged to my PC’s serial port (RS232). On the software side I used LIRC via the lirc_serial kernel module.

Just typing “lirc rasperry pi 2” on any available search engine gives me hints and How-Tos and motivation telling me that it won’t be difficult. Basically plugging the data-out-line (Vs) to a GPIO (the default being GPIO18), the 3.3V-line to a 3.3-volt-supply and the GND-line to ground should do the trick on the hardware side. An IR-receiver has three “legs”: Vs, 3.3V and GND. Mine has the GND in the middle, Vs left and 3.3V right (from the front view, where the half-bulb is).

I’m using Raspian Jessie and thus a recent kernel which uses DeviceTree for configuring the board’s hardware capabilities (previously this low-level board-layout-configuration was compiled into the kernel). To make the lirc_rpi-module work, the system needs to reserve GPIOs for it at boot-time. On a fresh jessie-installation that means I only need to un-comment one line (a DeviceTreeOverlay-line) of the config.txt-file in /boot:

# Uncomment this to enable the lirc-rpi module
dtoverlay=lirc-rpi

I plug the device using GPIO18 for data-in, I check the voltage, I chang the config.txt, I reboot, I run the mode2-tool and tap on my remote-controls. And nothing appears.

Fortunately, to debug such issues, I have access to superior tools, in this case an oscilloscope and, even more important, a competent colleague with hardware-knowledge. We, or better he, find(s) the problem within 2 minutes. Alone I would have wondered and doubted everything.

IR receiver on RPI, with probe plugged

After plugging the Raspi and its IR-receiver to the oscilloscope (probing the data-line of course) and putting the trigger level low enough we can observe the following sequence appearing when playing around with a remote control:

IR receiver on RPI, pull-down-active

As my colleague takes the first glimpse at this curve he immediately shouts: “it is missing a pull-up-resistor”. What makes him say that is the amplitude-delta of only 1 volt compared to the expected 3.3 volt.

This IR-receiver is an active-low receiver: it forces or drives the line to 0 when it wants to transmit a zero and it does nothing on the line to signal a one. To have the signal bounce back to the 3.3 volt when the device releases a pull-up-resistor is needed. Which is a high-Ohm-resistor (10K for example) coupling the data-line with the 3.3 volt supply line. The opposite is a pull-down-resistor: coupling the data-line with the ground for devices which are active-high and thus driving a 1 to signal a one and nothing to signal a zero.

Neither-nor is present in my setup which is the reason for the 1-values to be stuck at ~1 volt. Depending on the load here and there on the GPIO-PADs of the Raspi we could have also seen 2 volt or even nothing.

While my colleague looks for a high-Ohm resistor I’m sure that the chip-maker has thought of this problem and that there is an internal pull-up or pull-down on each GPIO-pad which can be activated. After quick search I find indeed what I was looking for: setting a GPIO-pull-up (or down) is a parameter to the dtoverlay of lirc-rpi.

# Uncomment this to enable the lirc-rpi module
dtoverlay=lirc-rpi
dtparam=gpio_in_pull=up

After applying this change and rebooting, running mode2 gives me the numbers printed out I expect and on the oscilloscope a clean amplitude of 3.3 volts is seen:

IR receiver on RPI, pull-up-active

Raspberry Pi 2, Raspbian Jessie and WiFi vs. Ethernet at boot-time

I just installed Raspbian Jessie on my new Raspberry Pi 2. I’m using an Edimax EW-7811Un USB WiFi-adapter as a primary network device which I want to configure cleanly within my dis
tribution. Cleanly, in the sense of changing as little as possible the system’s configuration-files and scripts.

Raspberry Pi 2Of course I found several nice tutorials (1 2 3) which indeed helped me to figure how to do it properly
and gave me a good start (especially for wpa_supplicant.conf, which I won’t detail here) . However, the original content of the config-files mentioned there, wasn’t matching with what I found on my installation. Maybe it is because Jessie is still quite new as of writing this.

Starting with the /etc/network/interfaces-file. It mentions eth0 (the wired ethernet port) and two wlan-devices and it says they are all configured manual.

auto lo
iface lo inet loopback

iface eth0 inet manual

iface wlan0 inet manual
    wpa-conf /etc/wpa_supplicant/wpa_supplicant.conf

iface wlan1 inet manual
    wpa-conf /etc/wpa_supplicant/wpa_supplicant.conf

Manual in this context means that the ifplugd takes over the network configuration. Ifplugd detects a physical connection and launches a dhcp-client to complete the interface-configuration. As of writing this, it does not properly take care of wlan-devices, however this it is how ifplugd is configured (from /etc/default/ifplugd).

INTERFACES="auto"
HOTPLUG_INTERFACES="all"
ARGS="-q -f -u0 -d10 -w -I"
SUSPEND_ACTION="stop"

My RPI2 will be used mainly via WiFi, but for debugging reasons I might plug the wire. Hence I’d like the system to always (try to) configure the WiFi-device and optionally the wired if a cable is plugged. To achieve this, here is what I did.

First I changed the way wlan0 is configured in interfaces, telling it to automatically be configured when the networking-service is started (at boot-time):

auto wlan0
allow-hotplug wlan0
iface wlan0 inet dhcp
    wpa-conf /etc/wpa_supplicant/wpa_supplicant.conf

Then I told ifplugd to no more using all devices but only eth0. I ran:

sudo dpkg-reconfigure ifplugd

And during the follow dialog asking me for “static interfaces to be watched by ifplugd’ I replaced auto by eth0. This makes /etc/default/ifplugd look as follows:

INTERFACES="eth0"
HOTPLUG_INTERFACES="all"
ARGS="-q -f -u0 -d10 -w -I"
SUSPEND_ACTION="stop"

This does exactly what I want with very few changes to the system’s files, thus clean.

UPDATE 30/10/2015:

I just did an apt-get update of my jessie installation and noticed that upstream has changed the interface-file. It now contains the allow-hotplug-lines I added to my interfaces. However, this does not change anything regarded the problematic I had on my system.

A tableau by “Jean Eve” or is it not?

In March 2015 I bought this tableau from a private seller, a very nice person.

Jean Eve: Stein am Rhein, Switzerland

It is signed and was thus attributed to ‘Jean Eve’ by the seller. It was told to the seller, when he acquired it, that it shows a town in the Val D’Oise département in France named La Roche Guyon.

I have seen (before and since this acquisition) quite some pictures painted by Jean Eve. This one seemed quite different. To my amateur eyes this is basically due to the use of much more colors in comparison to other pictures. Whereas the straight lines and the blurry trees/valleys are quite resembling.

The day after having received the tableau, I had the idea to see how this place looks today. No problem, I thought, with today’s technology: Google Maps and Google StreetView will bring you anywhere instantly.

The mentioned town is located on the Seine-river. When looking it up on a map however, I saw there is no bridge. Over time bridges can disappear, especially in places in France under German occupation during World War II and this picture could well be before that date. However, StreetView was even more conclusive: there is no slope in this town or at least not such a steep one. And no castle or fortress in the upper part.

My conclusion: this cannot be the right place. Maybe it is another nearby town or village. I started to look where there are bridges not far away. I found one and looking at the bridge with StreetView I realized the Seine river is much larger than the one on the tableau. Conclusion: this is not at all the right place.

Switzerland?

To find out more I had to change my strategy and continue with the help of things visible on the tableau. I started with concentrating on the name of the hotel which is written with red ink on the biggest building close to the bridge. I was able to read the word “Hotel” quite easily, but the rest was much harder to decipher.

I started to read letter by letter: Hotel ‘B n e i t e t s’ was my first attempt, followed  ‘B y b u e r o l e t s’ . Using Google’s spell-correction I hoped to find miraculously the right name. It didn’t. And the more I changed the letters, the less the word made sense. The ‘n’ could have been a ‘u’. The two ‘t’s could be ‘l’s and ‘f’s. What is a ‘tefs’?

Then I had the idea to magnify the inscription with my camera taking a macro-picture. This was the key.

Jean Eve: Stein Am Rhein, Hotel Rheinfels

I now read B r e i n f e l s. Breinfels. In the meantime, due to Google’s geo-localisation-based suggestions I switched to duckduckgo.com and it corrected “hotel breinfels” to “Hotel Rheinfels”. Just looking at the first pictures it became clear: this is it. Hotel Rheinfels in Stein am Rhein in Switzerland. And not in France. First image was this page.

To be sure, I clicked on other links, among it a blog which was talking about Stein am Rhein and Hotel Rheinfels with lots of pictures one of it the fortress (Hohenklingen) up the hill. The silhouette of it was exactly the one in the tableau. Now I was sure about the place.

OLYMPUS DIGITAL CAMERA

Image copyright: TravelsForFun – the Snyder family – see their blog: https://travelsforfun.wordpress.com/

Is the tableau authentic?

While at first I just wanted to see how the depicted place looks nowadays, having found out that the original description of the tableau is not correct, I need to make sure that the rest is authentic. Basically, this means to answer the following questions:

  1. When was it painted?
  2. Can the tableau authentically associated with Jean Eve?

These two questions are actually related. When I have some time, I will dig into it.


#RealLifeOops – Gare d’Austerlitz – Metro 5

Seeing Linux in the wild, used in real-life-applications is nice. Sometimes hard to identify, except when it is crashing.

This is an information panel operated by RATP, the company handling the Metros (subways) in Paris. Located in the south entrance of the line 5 at the Gare d’Austerlitz-station. It must have received an update in the past year, because before 2014 I have seen several OOM Oops’. This time it is just a looping stacktrace. In both cases I think it is a hardware problem which might be related to overheating, weather is quite nice currently in Paris.

IMG_20150612_082803 

Create an OpenCV 2 matrix from a JPEG-image in a buffer #2

Even before publishing my previous article about OpenCV and JPEG-images from buffers, I found the cv::imdecode()-function. But it was Peter’s comment which made me really take a look and compare the two methods.

Here’s the code I’m using to create a cv::Mat from a JPEG-image in a buffer using cv::imdecode().

void handleImage_o(const uint8_t *buffer, size_t size)
{
 std::vector<uint8_t> v;
 v.assign(buffer, buffer+size);
 cv::Mat img = cv::imdecode(v, CV_LOAD_IMAGE_COLOR);
}

Yes, it is only 3 lines compared to the 20+ lines using libjpeg… My initial doubt about imdecode() was the speed of decoding. Will it be as fast as my manual approach? Well, almost!:

This quick and dirty benchmark is of course subjective and not usable for reference as it lacks spread, but for my use case it is enough to help me make a decision.

I decode 100 times the same image (4288×2848 pixels) and just measure the time(1) it took. Here are the results with imdecode()

real 0m14.600s
user 0m13.652s
sys 0m0.956s

versus libjpeg-turbo.

real 0m12.476s
user 0m11.736s
sys 0m0.760s

My version using libjpeg-turbo is roughly 14% faster than imdecode() from OpenCV 2.4.9.1 .

Is 14% justifying the complexity of the libjpeg-based code? That’s up to you to decide.

Create an OpenCV 2 matrix from a JPEG-image in a buffer

I recently started to take a look at OpenCV for doing some (programmatic) image processing for a small project I’ll maybe talk about later on.

My problem: in my program I receive JPEG-images in a buffer over a network connection and not by opening a file. Now my question was: how to create an OpenCV Mat(rix) from this buffer? Normally should not fill a whole post, but it took me too much time to develop to not document it now.

Strange enough, even on Stackoverflow I only found partial answers. I did a half-hearted web-search and found nothing really complete. Here are the facts I gathered (no guarantee for their correctness, but this is my current state of understanding)

  1. OpenCV does not directly support the importation of JPEGs from a buffer (but it does support the reading of a file).
  2. You need to use a libjpeg-variant to create an uncompressed image which then can be imported into the Matrix
  3. OpenCV  needs images in BGR-colorspaces to be processed further on, by default images are in RGB-colorspace

When doing this kind of  processing I want to limit copies and processing time. Here’s the code I came up with:

class ImageProcessing
{
  struct jpeg_decompress_struct cinfo;
  struct jpeg_error_mgr jerr;

public:
  ImageProcessing()
  {
    cinfo.err = jpeg_std_error(&jerr);
    jpeg_create_decompress(&cinfo);
  }

  ~ImageProcessing()
  {
    jpeg_destroy_decompress(&cinfo);
  }

  void handleImage(uint8_t *buffer, size_t size)
  {
    jpeg_mem_src(&cinfo, buffer, size);

    switch (jpeg_read_header(&cinfo, TRUE)) {
    case JPEG_SUSPENDED:
    case JPEG_HEADER_TABLES_ONLY:
      return;
    case JPEG_HEADER_OK:
      break;
    }

    cinfo.out_color_space = JCS_EXT_BGR;

    jpeg_start_decompress(&cinfo);

    cv::Mat src = cv::Mat(
                      cv::Size(cinfo.output_width, cinfo.output_height),
                      CV_8UC3);

    while (cinfo.output_scanline < cinfo.output_height) {
      JSAMPLE *row = src.ptr(cinfo.output_scanline);
      jpeg_read_scanlines(&cinfo, &row, 1);
    }

    jpeg_finish_decompress(&cinfo);

    cv::imshow("test", src);
    cv::waitKey(0);
  }
};

Summary: I decode the JPEG-buffer using libpjeg-turbo (pre-installed) directly into the buffer allocated by cv::Mat, using the BGR-colorspace as expected by OpenCV.

Line 30: is where I’m telling libjpeg to decode directly to BGR-colorspace
Line 39-40: does the decoding line-by-line directly into the cv::Mat-buffer correspond to the line which can be easily retrieved by the cv::Mat::ptr()-method.

Careful, this code is just a snippet showing how I did. It is neither complete nor self-standing.

‘Gallery Carousel Without JetPack’-plugin and htaccess-protected wp-admin.

I maintain several WordPress-installations and I received the request to protect the wp-admin-subfolder with a second level of password protection using .htpasswd and .htaccess. Which makes a second user/password-query appear on the browser when trying to access the admin-folder. It works fine, no problem with that.

However, I’m also using the ‘Gallery Carousel Without JetPack‘-plugin to enable simple and nice full-screen galleries. It turned out, that this plugin is requiring admin-ajax.php to request comments (via JQuery/Ajax) which are displayed for each image. As this file is located in the wp-admin-folder all anonymous users (so all site-visitors) were prompted for username and password when opening any gallery.

I don’t know whether there is another/better way for plugins to fetch comments with Ajax, but to fix this problem on my site, I excluded the admin-ajax.php from .htaccess-protection by adding

<Files "admin-ajax.php">
    Allow from all
    Satisfy any
</Files>

on the top of my wp-admin/.htaccess– file. Brett Batie has made a nice short post about .htaccess-exclusions – though he forget to add the closing </Files> to his single-file-example.

This is my complete .htacces-file now:

<Files "admin-ajax.php">
    Allow from all
    Satisfy any
</Files>

AuthType Basic
AuthName "Secure area"
AuthUserFile /<absolute-path-to-wordpress-on-the-server>/wp-admin/.htpasswd
AuthGroupFile /dev/null
require valid-user